Drake’s Signature Fade: How to Achieve the Rapper’s Iconic Haircut
Introduction
Drake, the Canadian rapper, singer, and songwriter, is not only known for his chart-topping hits but also for his iconic hairstyle. Drake’s signature fade has become a trendsetter in the world of men’s grooming. In this article, we will explore the steps to achieve Drake’s iconic haircut.
The Drake Fade: A Brief Overview
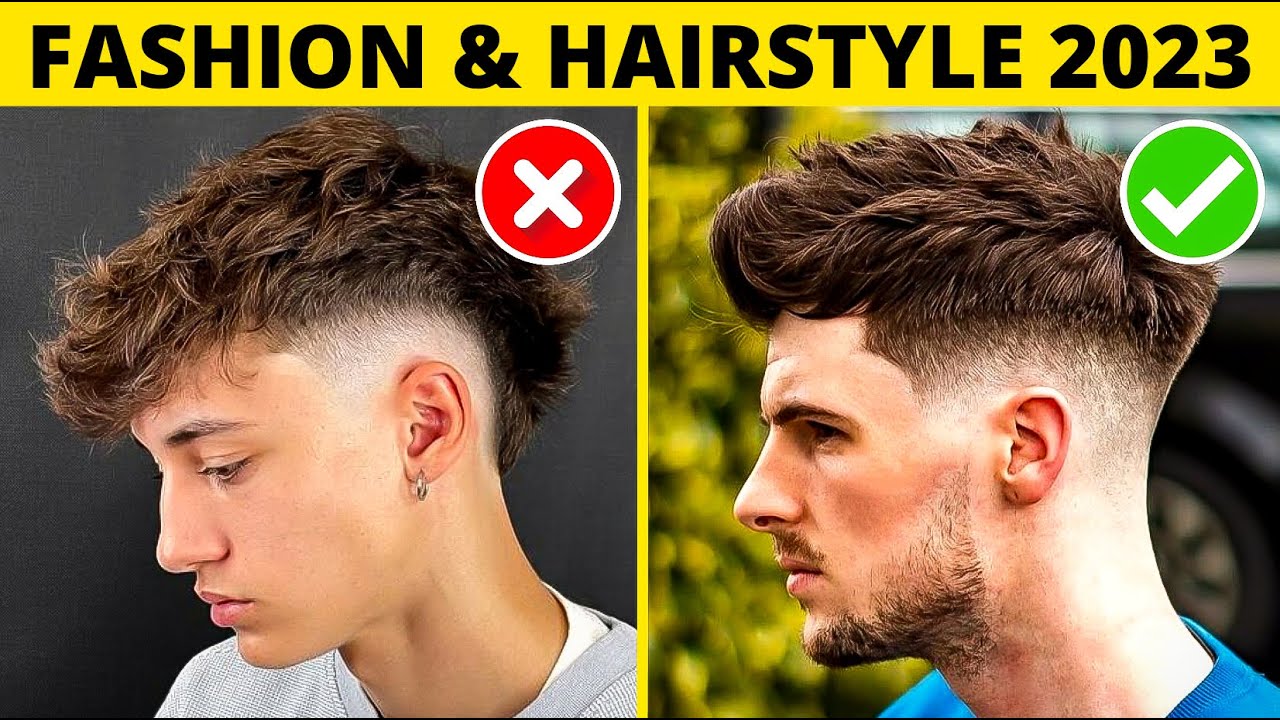
Drake’s fade is characterized by short sides that gradually taper into longer hair on top. This haircut creates a clean and polished look with a touch of edginess. The length and texture on top can vary, allowing for versatility in styling. Achieving this haircut requires precision and attention to detail.
Step-by-Step Guide to Achieve Drake’s Signature Fade
Step 1: Preparation
Before attempting the Drake fade, make sure you have the right tools. You will need a quality pair of clippers, various clipper guards ranging from 0 to 3, a comb, scissors, and a handheld mirror to check your work from different angles.
Step 2: Start with the Sides
Begin by using a higher guard, like a number 3, and work your way down. Start at the temples, moving in an upward motion along the sides and back of your head. Gradually switch to lower guards, like number 2 or 1, as you work towards the bottom. Ensure you blend the different guard lengths smoothly for a seamless fade.
Step 3: Blending
To create a natural transition between the sides and top, blend the sideburns into the longer hair on top. Use a slightly higher guard, like a number 2, and delicately fade the sideburns towards the temple area. This will achieve a clean gradient effect.
Step 4: Tapering
Next, focus on tapering the hairline at the back of the neck. Use the clippers without a guard for a close and clean edge. Create a rounded or squared shape, based on your preference, and ensure it blends seamlessly into the faded sides.
Step 5: Styling the Top
Now that the sides are complete, it’s time to tackle the hair on top. Drake is often seen with longer hair on top, allowing for various styling options. You can ask your barber to leave a few inches of length or simply style the existing length as desired.
iFAQs (Internet Frequently Asked Questions)
1. How often should I get a touch-up for the Drake fade?
It depends on how fast your hair grows and how well the initial fade was executed. On average, scheduling a touch-up every 2-3 weeks is recommended to maintain a clean and sharp look.
2. Can I achieve the Drake fade on my own?
While it is possible to attempt the Drake fade at home, it is recommended to seek professional help, especially for the initial haircut. Barbers have the expertise and precision required to achieve the desired results. Once you have the initial fade, you can keep up with touch-ups at home if you’re confident in your skills.
3. What products should I use to style the hair on top?
Drake often rocks a natural, textured look on top. To achieve this, use a matte styling product like a clay or pomade. Apply a small amount to your fingertips, rub it between your hands, and work it through your hair to create the desired texture and hold.
4. Can I customize the Drake fade to suit my personal style?
Absolutely! The beauty of the Drake fade is its versatility. You can experiment with different top lengths, textures, and styling products to reflect your unique style. Discuss your preferences with your barber to achieve a personalized version of the Drake fade.
Conclusion
Drake’s signature fade is a hairstyle that exudes style and confidence. By following the steps outlined in this article and seeking professional help if needed, you can achieve this iconic haircut. Remember that practice makes perfect, so don’t be discouraged if it takes a few attempts to master the art of the Drake fade. Embrace your individuality and put your own spin on this classic haircut. Now, go out there and rock your signature Drake-inspired style!